Labels

Java (10) Spring (10) Spring MVC (6) Web Services (5) Rest (4) Javascript (3) Nodejs (3) Spring Batch (3) Angular (2) Angular2 (2) Angular6 (2) Expressjs (2) Passportjs (2) SOAP (2) SOAPUI (2) Spring Boot (2) AJAX (1) H2 (1) JQuery (1) JUnit (1) Npm (1) Puppeteer (1) Python (1) RaspberryPi (1) Raspbian (1) SQL (1) SQLite (1) Scripts (1) html (1)
Showing posts with label SOAP. Show all posts

Saturday, May 27, 2017

SoapUI mock web services tricks

In a previous article I explained how to create and deploy a mock web service using SOAPUI.

In the process of testing applications sometimes you need to do quick changes in a mock web service and deploy it shiftly.

XML project file in SoapUI

When you export a SoapUI project you will get an xml that contains all the information and configuration of your project. Furthermore, if your project contains a mock service with its responses, those will be inside that xml.

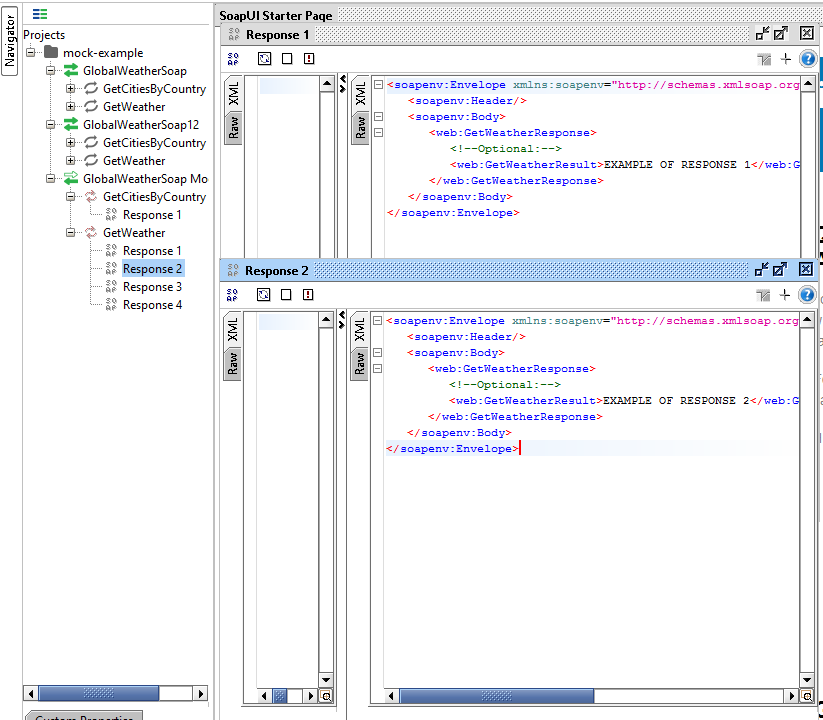
For instance I have created this simple project


I have added three very simple responses:


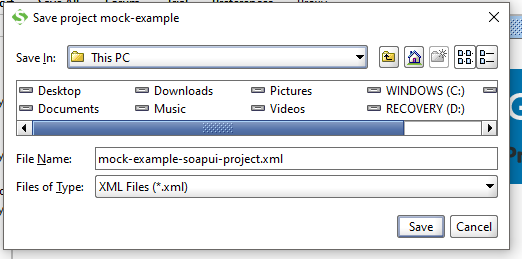
You can save it with Project --> Save project as


 Then, if you open that xml flile, you will see that at the end of it are the responses that I created above.


So If you change the data in those responses and import the project again you will see that the responses have changed accordingly.

This is a method that I found out for doing quick small changes across several SoapUI projects that I use frequently. 

Nevertheless I still have not figured out how tho add responses using only this xml file. I do not fully understand the headings of the responses.


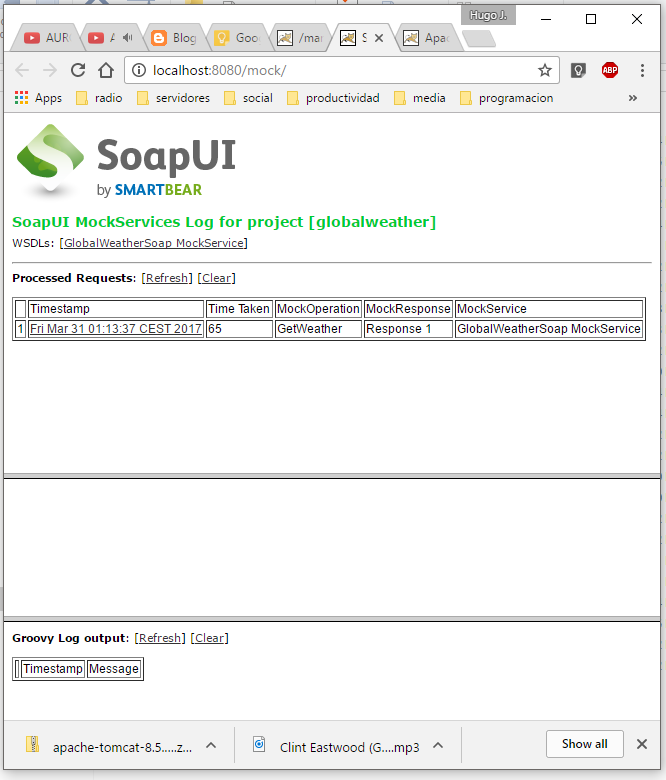
Deploying a SoapUI mock web service as a war file using the command line.


So if you have saved your soapui project into a xml as we did above, you can create a .war from it using the command line. I have troubles finding information about this and I think it is a great trick.

This is the .bat file that I use:


set war_file=D:\hugo_documentos\mock2.war
set war_dir=D:\hugo_documentos
set xml_dir=D:\hugo_documentos\mock-example-soapui-project.xml
set soapui-settings=C:\Users\hugo\soapui-settings.xml

cd /d C:\Program Files (x86)\SmartBear\SoapUI-5.3.0\bin

wargenerator.bat -f %war_file% -d %war_dir% -w true -x true -s %soapui-settings% %xml_dir%

pause

The trick is to use an executable called wargenerator that you will find inside the bin folder of your SoapUI installation folder. You will have to give it as inputs the place where you want the war file, the war directory, the SoapUI settings xml and the xml of your project.

I hope this helps!


Thursday, March 30, 2017

Creating and exporting SOAP mock web services with SOAPUI

Problem

Sometimes you have to test an application that depends on several web services. Imagine that some of those web services fail or change while you are testing your application.
Something like that could difficult your work, that why you may need to fabricate a ad-hoc web service that imitates (in a very simple way) the one that you are invoking.

These fabricated web services are called mock services. Let us see how produce and export one (into a Tomcat Server) using SOAPUI.

1. Create a SOAPUI project from a WSDL

We will use the following wsdl :

http://www.webservicex.com/globalweather.asmx?WSDL

(with the actual .wsdl file the process will be very similar)

So first go to File | New SOAP Project


2. Create a Mock WS from our project


Now once you have the two interfaces, right click on the project and select Generate Mock Service. There you will choose the endpoint and the port. This port will only work for the SOAPUI mock service, if we export the project to a war and deploy it in a tomcat, the port that we will need will be the one in the Tomcat server..


Now we have the mock created. To add mock responses we click on it and start inventing responses using the template that it offers us. For instance I added two dummy ones. This web service will give you only two responses and it will give them to you sequentially (independently from the input)


You can test your own mock ws by clicking on the mock and selecting "start minimized",

it will appear below


and it will listen the endpoint

http://localhost:8088/mockGlobalWeatherSoap

(this endpoint will work only for this step, as I said once we deploy it in a tomcat this will change). You can test it and see how it only gives us the two requests that we gave it:


3. Export the mock Service into a .war file


Click the project with the right button and select Deploy Project as WAR


4. Deploy the .war file into a tomcat server

You can download the last version of Tomcat here

If you open the tomcat main folder, you will find this:

 To deploy a .war file in any tomcat server you can just paste the file inside the webapps folder. Then when you start the Tomcat by executing the file startup.bat (startup.sh if you are in linux) the server will deploy it
Have in mind that to run a tomcat server you will need to have the JAVA_HOME variable set (with java 7 at least if you use Tomcat 8). If you are in a linux machine you will have to change the permissions of the whole bin folder using chmod -R -777 /path-to-bin-folder/.

You should see something like this if everything goes well


Your server now will be listening to the url:

http://localhost:8080/mock/

and the endpoint (for soap requests)

http://localhost:8080/mock/mockGlobalWeatherSoap

You can see it using a browser:


And you can test it using SOAPUI. As you see it gives us the two dummy responses in sequence:


Using the browser you can see the logs, which is a nice feature.