Problem
I have been listening to audiobooks lately. If you try to listen long audiobooks you will normally have to handle a lot of mp3 files in your phone or mp4 device. If these files are not well tagged, you will struggle jumping from one chapter to the next and you will end up mad.
One solution is to tag them manually by clicking one file after the next and changing one label after another (tittle, artist, track...). I solved this by automatically assigning the title as the filename using python.
Changing audio tags using python
There are many python libraries out there that allow you to read and edit audio tags. The one that has given me better results is mutagen. To use it you will need to install it with
pip install mutagen
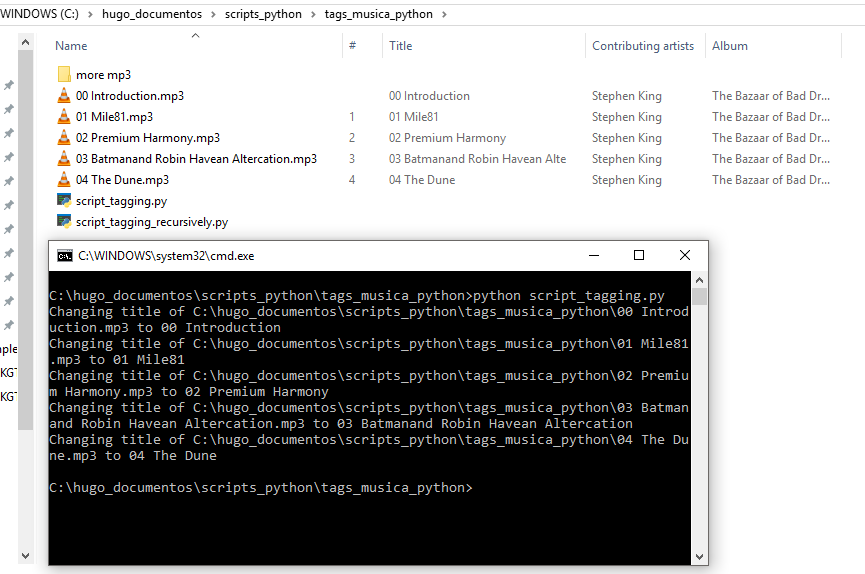
The following script takes all the files inside the folder where it its contained and sets their title tag as their respective filename (without extension)
Before changing the tags it renames the file so that it has a cleaner name (removing rare characters).
Before changing the tags it renames the file so that it has a cleaner name (removing rare characters).
import os
from mutagen.mp3 import MP3
from mutagen.id3 import ID3, TIT2

def clean_filename(filename):
 keepcharacters = (' ','.','-','_')
 return "".join(c for c in filename if c.isalnum() or c in keepcharacters).rstrip()


def rename_cleaning_filename(filename):
 os.rename(filename, clean_filename(filename))

def extension(filename):
 return '.' + filename.split('.')[len(filename.split('.'))-1]

def remove_extension(filename):
 return filename.split(extension(filename))[0]

for filename in os.listdir('.'):
  rename_cleaning_filename(filename)

music_folder = os.path.dirname(os.path.realpath(__file__))

for file in os.listdir(music_folder):
 if os.path.isfile(file):
  filename = os.path.join(music_folder, file)
  if (extension(file) != '.py'):
   tags = ID3(filename)
   print('Changing title of ' + filename + ' to ' + remove_extension(file))
   tags["TIT2"] = TIT2(encoding=3, text = remove_extension(file))
   tags.save(filename)
If for you want to change other tags you can do it similarly, here you have more examples.
Tagging files across subfolders
If you want to do the same thing as before, but tagging all the files inside all the subfolders of a folder, you can use this python code instead:
import os
from mutagen.mp3 import MP3
from mutagen.id3 import ID3, TIT2

def clean_filename(filename):
 keepcharacters = (' ','.','-','_')
 return "".join(c for c in filename if c.isalnum() or c in keepcharacters).rstrip()


def rename_cleaning_filename(filename):
 os.rename(filename, clean_filename(filename))

def extension(filename):
 return '.' + filename.split('.')[len(filename.split('.'))-1]

def remove_extension(filename):
 return filename.split(extension(filename))[0]

for filename in os.listdir('.'):
  rename_cleaning_filename(filename)

music_folder = os.path.dirname(os.path.realpath(__file__))

for root, subdirs, files in os.walk(music_folder):
 for file in files:
  filename = os.path.join(root, file)
  if (extension(file) != '.py'):
   tags = ID3(filename)
   print('Changing title of ' + filename + ' to ' + remove_extension(file))
   tags["TIT2"] = TIT2(encoding=3, text = remove_extension(file))
   tags.save(filename)
The main difference is that here we are using the line
for root, subdirs, files in os.walk(music_folder):
which goes inside subfolders too.
Sample